Links
- Circle Lord
- Electric Quilt Company
- MQResource
- Visit Deb’s Blog
Where to find:

Solar Powered…concept to completion
Starting this weekend, on this page, you’ll get in depth information about my methods of design. I’ll take one of my current projects and walk you through the process step by step; from concept to completion. You’ll come away from this series with the tools to take your own concepts to completed works.
I’ll incorporate both still photos and videos to demonstrate the progression, and I’ll provide in depth information about the fabric, the preparation, threads, battings and tools used to draft, mark, stitch and embellish this quilt.
So stay tuned, and watch this piece come to life….and then, you can make your own vision come alive in cloth!
December 15, 2009
First, let me say that I am offering this as a process lesson, not as a pattern to be copied so please respect that. And this is a process that works for me. It is by no means the only way to approach the design process or it’s execution.
To start things off, lets talk about concept. When approached about participating in this project I was given a choice between using one of Irena’s designs for my quilt or designing my own. I chose to design my own. So how do I come up with a design? Well, once I know the parameters, I start looking through my sketchbooks to see if anything I have sketched previously speaks to me for this quilt. If not and I need to start from scratch, I usually begin by dividing a page in my sketchbook in half. On one side I make a list of nouns… put down every noun that pops into my head. On the other side of the page I do the same thing with verbs. My list is usually influenced by things I have been thinking about or doing lately, or have recently read. Since you already know the name of my quilt and it’s theme, that gives you a pretty good idea of the nouns and verbs on my list!
So next I choose a noun from my list that appeals to me, and then usually 3 or 4 verbs (sometimes more) from the list. Now I have the basis for a design idea. To refine it, I sometimes make another list of verbs and adjectives specific to the noun I have chosen. Now it’s time to begin sketching to bring the words to life. This is one of my initial sketches for this quilt.
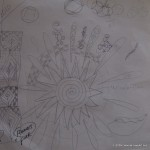
Now sometimes once I start sketching, I realize the idea is not going to work. In that case, I go back to my lists and start over. Luckily though things worked out for this design. So I spend some time refining and finalizing my sketch.
Once I am satisfied, I enlarge my design to it’s full size. Depending on the design, I may do this in one of several different ways. Take my final sketch to Staples and have them enlarge it; Scan it into my computer , then print it on a transparency and trace it using my overhead projector; posterize it in photoshop and print it out myself; or as in this case when the design is primarily geometric I draw it out on wide format graph paper. This paper is available in several size grids and roll widths and lengths. I generally use one with a half inch grid that is 36 inches wide and comes on a 100ft. roll. I just tape pieces together to get the size piece I need to fit my design.
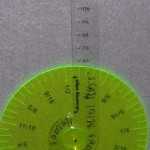
To draft my “sun” I used Renae’s mini ray tool. This tool makes drafting circular designs simple and precise.
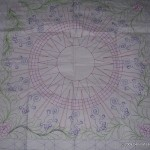
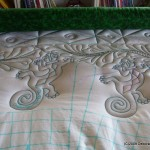
I make templates of any non-geometric shapes to make it easier to place those elements and keep the scale and proportion consistent. And here is my design drawn to size. Of course, as always happens, it under goes some changes as I start the quilting.
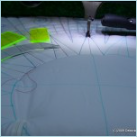
Next step is marking my fabric. For this quilt I am using Kona PFD (bleached white). It has a nice smooth finish which will be important when it comes time to add the color. Even though it is PFD (prepared for dyeing) I still run it through a hot wash with Synthrapol. I then iron it and fold it to mark my center and 8 quadrants. Then it’s ready to mark. Since this is a wholecloth, a radial design and all quadrants are symmetrical, in order to keep it that way the quilt must be marked before loading to quilt. On my full size drawing I go over my pencil lines with permanent markers so it is very easy to see the design through the white cloth even without a lightbox. So I tape my pattern down to my table and then line up the centers and quadrant lines and pin my fabric to the pattern. Now I mark the entire design with a blue mark be gone pen. When using these pens, it is important to test them on the actual fabric you are using to make sure they can be removed and not to get the quilt anywhere near heat once it is marked until the marks have been fully removed by soaking in cool water for 20-30 minutes… heat can permanently set the marks. Once the entire top is marked, I’m ready to load it and begin the quilting.
I have chosen a backing, in this case a wide back marble in a green color. I have also chosen my batting. I want my motifs to have a trapunto look so I will be doing a faux trapunto technique of using multiple battings and densely quilting the background so my motifs really pop forward. Also, since I will be adding color after quilting, I need to be sure the color does not come through to the back of the quilt. So I am using Warm& White on the bottom, Quilters Dream Puff in the middle, and Hobbs Polydown Plus as my top layer of batting. This gives me enough density to keep the color from soaking through and plenty of loft for my trapunto look…1 and 1/2 inches of loft!
And before someone asks, no, I did not raise my hopping foot. But, when you are quilting with this much loft you need to take extra care during quilting not to “push” things around with the foot. I keep the quilt sandwich pretty tight… both the roller tension and the side tension on the backing for this and use lots of pins.
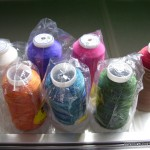
Last thing to do before quilting is to decide on threads. Since I will be adding color later, I am using colored threads to stitch my main designs. For the background fill between design motifs I am using a matching thread. I am using a combination of solids and variegated threads and I am using the same thread (type and color) top and bottom. For those who want to know the threads are all made by Superior Threads and are:
“So Fine” # 401,#495 & # 499 and “Lava” #201, # 202, #220 and # 233.
With all those decisions made and the top, battings and backing loaded, the quilting begins. I am quilting all the major motifs first and then the details and finally the background fill.
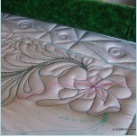
The tools I am using to help guide my stitching are “Janet-Lee’s favorite” ruler, Sherry Rogers-Harrison’s “dainty ditcher” and “Renae’s amazing arc” the size that fits the exact diameter of my circle.
Next time, some video of the stitching.
If you have questions or comments you can write them here.